How to add Google Analytics to your website?

Google Analytics helps you to better understand your website visitors.
- What channels do people use to reach your website?
- Who are the visitors to your website?
- What content do they consume the most on your website?
- How do they use your site?
Adding Google Analytics to your website has become standard among digital marketers.
However, there are still websites where the Google Analytics code has not been added to the website yet.
Google Analytics allows you to track and measure your website goals and return on investment (ROI) for digital marketing activities.
It is not difficult to set it up, but it is wise to set it up correctly from the first step. The “add-code-to-website-and-forget” solution doesn’t work here.
Before we look at how to set up Google Analytics on your website, let’s take a closer look at what Google Analytics can do.
Good to know
Google Analytics allows you to track and measure your website goals and return on investment (ROI) for digital marketing activities.
Why it’s a good idea to use Google Analytics?
Google Analytics lets you track:
- Total website traffic
- The channels through which the most traffic to your website comes from
- Traffic to pages / subpages / landing pages
- The number of contact requests generated through the website
- The total amount of sales generated through the website
- Demographic background information for website visitors
- An overview of the devices used to visit your website.
Google Analytics is great for freelancers, bloggers, influencers, small and large businesses. This is also the reason why 56% of all websites in the world use Google Analytics to collect and process website data. As a bonus, this is a free tool.
How to add Google Analytics to your website?
- Create a Google Tag Manager account and add it to your homepage
- Create a Google Analytics user
- Set up Google Analytics code for your website via Google Tag Manager
- Add key website performance metrics to Google Analytics
01Create Google Tag Manager account
What’s Google Tag Manager?
Google Tag Manager is a tool that makes it easy to add JavaScript snippets to your homepage. You do not need programming knowledge to do this.
Google Tag Manager is simple – it acts as an “intermediary” between the data coming from a website and third-party platforms.
For example, Google Tag Manager allows you to add a Facebook Pixel or LinkedIn Insight Tag to your homepage with a few clicks without involving a web developer. Our recommendation is to add Google Tag Manager to your website during the development of the site.
Why use Google Tag Manager?
Effective digital marketing requires an accurate understanding of what is happening on your website.
This is why you often need to add Javascript snippets like Google Analytics, Facebook Pixel, Linkedin Insight Tag, or Hotjar to your website.
Over time, such snippets of code may accumulate on your website, so it’s a good idea to manage them on a single platform.
Adding different Javascript snippets to your webpage manually will slow down your webpage. Javascript snippets added through Google Tag Manager do not drastically affect the speed of a web page.
If by manually adding the code to the website, the page is loaded in a so-called certain order, ie synchronously, then through Google Tag Manager the different code bars added to the website are loaded asynchronously.
Simplified:
When you go to the grocery store, you have a list of things you need to buy:
- Potatoes
- Wine
- Salt
Going through the list synchronously would mean that you would not take wine until you had added the potatoes to the basket.
Asynchronously, you would approach the problem in such a way that YOU go to find potatoes and at the same time your husband goes to get wine and your child looks for salt.
In other words, the asynchronous solution is simpler and faster, especially when there are more than 3 bars of code in the list.
GTM also helps you measure specific events through Google Analytics, such as file downloads or button clicks.
How to create a Google Tag Manager account?
To get started, you need to create your Google Tag Manager account here.
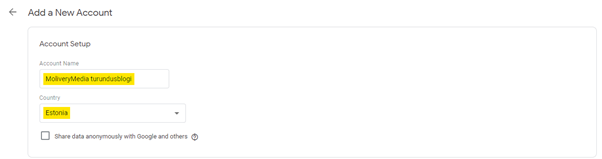
Creating a new account you’ll need to choose an Account Name and Country you operate your business in.
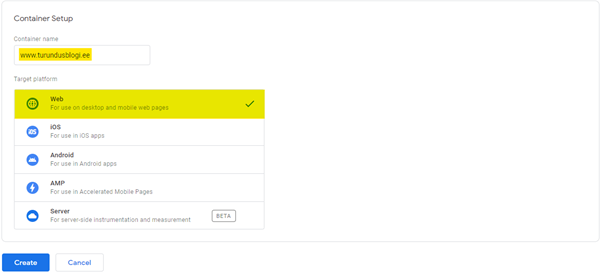
Choose the right Container name and Container type how you’ll want to use it. Note that for Web and Mobile OS’s you’ll need to create separate Google Tag Manager Containers.
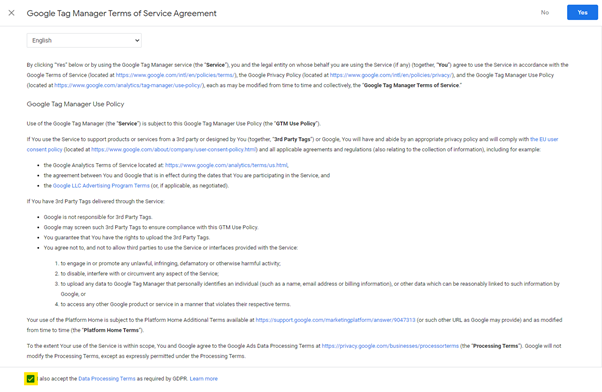
Agree with the Terms of Service Agreement
In the next step, you’ll see a unique Google Tag Manager code snippet. Copy the <head> and <body> tags.
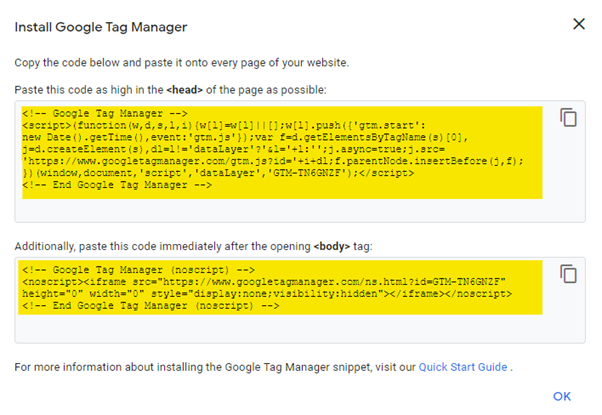
Add these two snippets of code to each page of your website as the guide says. If you have a web developer, please share your Google Tag Manager code with them and follow the same instructions.
However, if you are the sole host of your website, you can add these two lines of code to your WordPress theme using WordPress. An easier way is to use a WordPress plugin called “Insert Headers and Footers”.
02Create Google Analytics account
Start the process by clicking here.
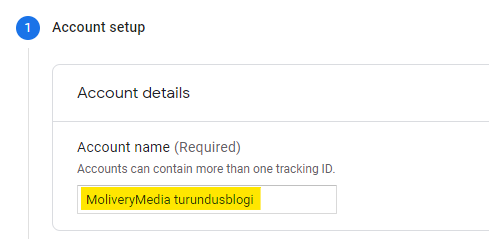
Then name your Account.
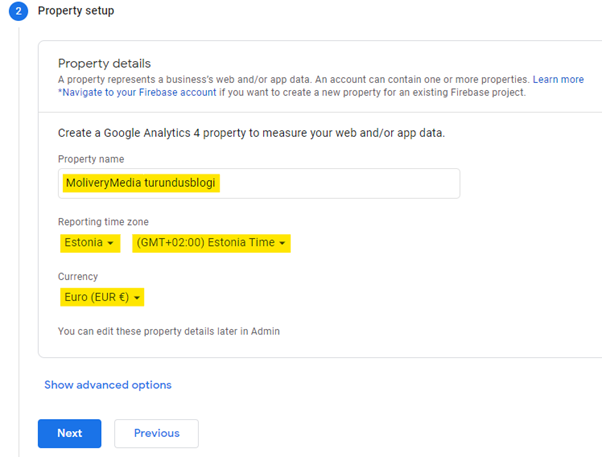
Now enter the name of your Google Analytics property to get you started. Choose the country, preferred time zone, and currency.
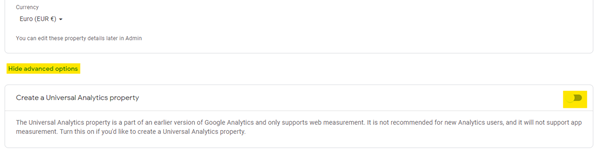
If you want to create a Universal Analytics account, you still have the option to do it today. For the Universal Analytics user, please be aware that you will not be able to track the activity on your mobile applications.
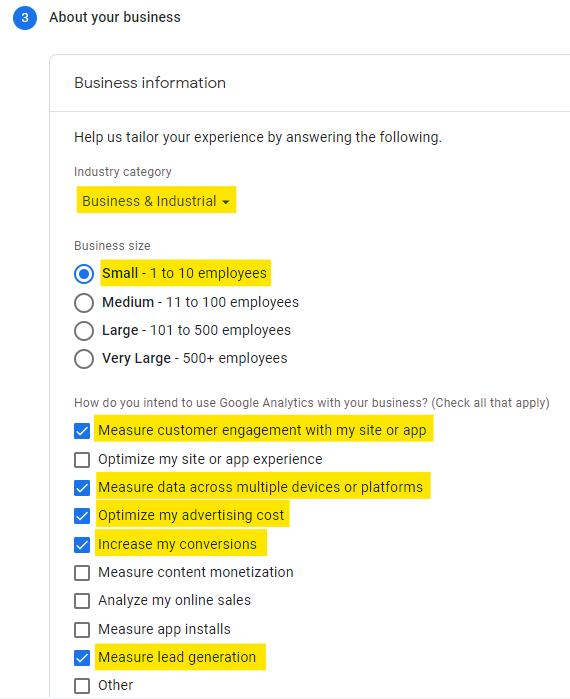
Add your business sector and goals for why you want to use Google Analytics.
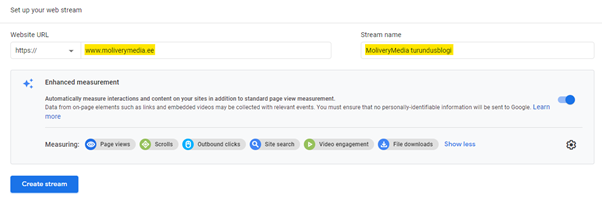
In the next step, select the feed from which Google Analytics will collect information. In our example, this is a website where we want to gather information about the usage of it.

Add your website URL and name the Stream. Click “Create stream”.
You’ll now see your Google Analytics Measurement ID. Copy it.

03Use Google Tag Manager to add Google Analytics to your site
Now, go back to Google Tag Manager.
Click “Tags”.
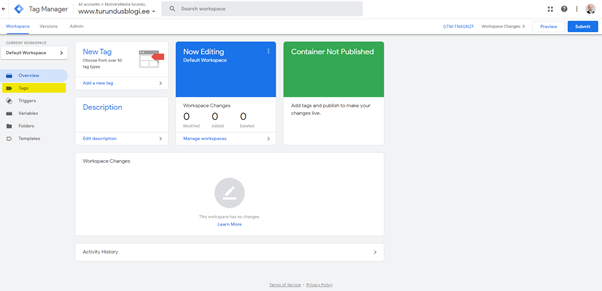
Create a new “Tag”.

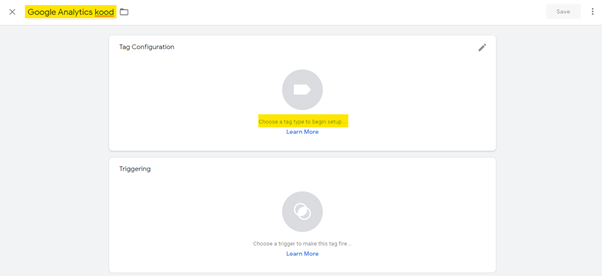
Add a name to your tag so you can differentiate them later. In our example, name the tag “Google Analytics” or “Google Analytics Code.”
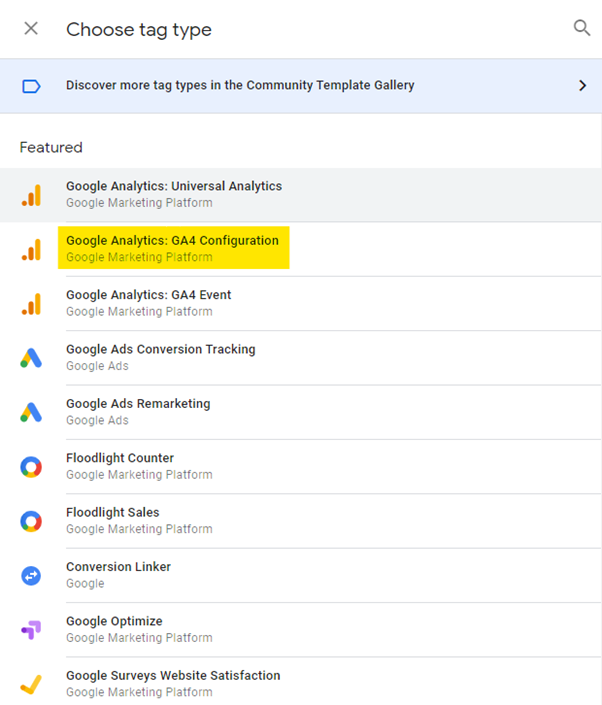
Click the “Tag Configuration” button.
In our example, since we’re currently adding the Google Analytics GA4 code to your webpage, select “Google Analytics: GA4 Configuration.”
However, if you want to add GA3 code to your website, select “Google Analytics: Universal Analytics.”
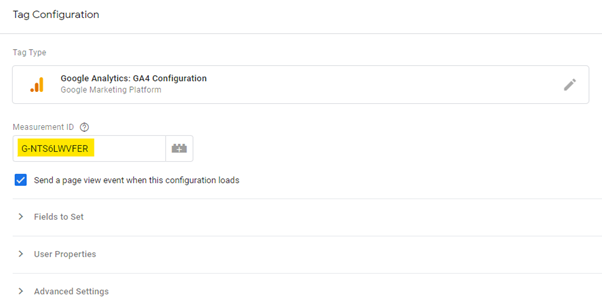
Add the “Measurement ID” code copied from Google Analytics to Google Tag Manager.
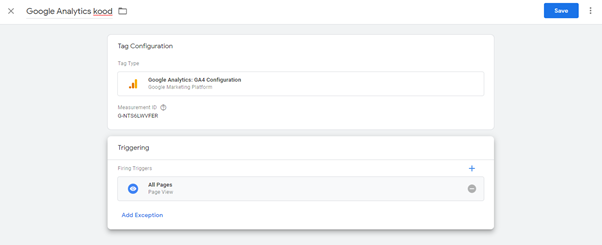
Click on “Choose a trigger to make this tag fire…”.

At the moment, our goal is to record every movement on the website. Therefore, in Google Tag Manager, we create a rule that the Google Analytics code is activated on each page.

If you’ve done well with the previous settings, you should now be able to successfully configure your Google Analytics code so that data from each page of your website is transmitted to Google Analytics.
Check it out for yourself and click “Save”.
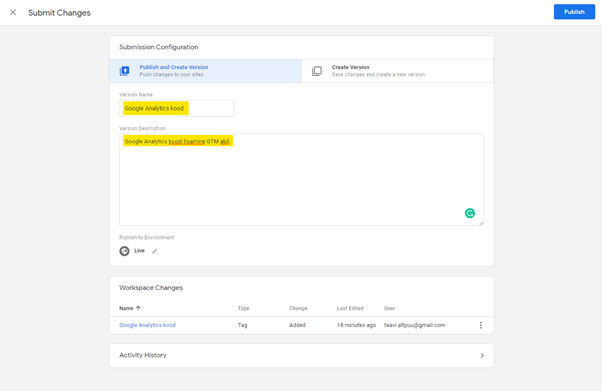
Next, you’ll see “Workspace Changes: 1” in the upper-right corner of the home page. This indicates that you have one change that you haven’t posted in real-time. Click “Submit”.
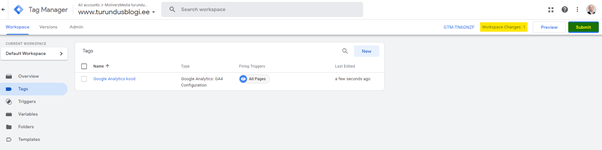
It is recommended to add a comment to each change – what was changed, how it was changed and what the purpose of the change was. This way, at a later stage, an agency, for example, changes anything in Google Tag Manager, you’ll have an overview of the changes they’ve made.
Finally, click “Publish”.
An easy way to verify that the Google Analytics code was added correctly to your webpage is to use the “Tag Assistant Legacy” plugin in your Google Chrome web browser.
By downloading the plugin, you can track which Google Javascript strips have been added to your website, whether they have been properly implemented on the website, and whether or not they are successfully passing the information back to Google Analytics.

04Add website KPIs to Google Analytics
Although you know the key performance indicators (KPIs) for your website, Google Analytics does not yet know it.
That’s why we set up key metrics in Google Analytics so you can easily track them later.
At the moment, we take as an example a situation where we want to measure the contact queries made on the website.
The layouts of the websites are different and the end result can be interpreted differently. In this example, we assume that when a person submits a contact request, they will be directed to the “thank-you” page, and this will act as an indicator of the contact request sent.
We need to go back to Google Analytics to make this setup.
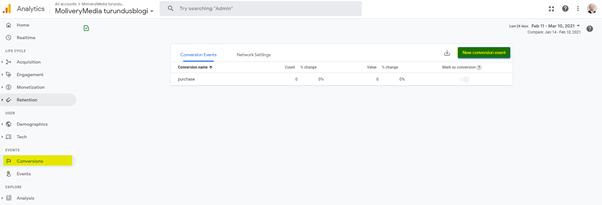
Go to the “Conversions” category and click the “New conversion event” button
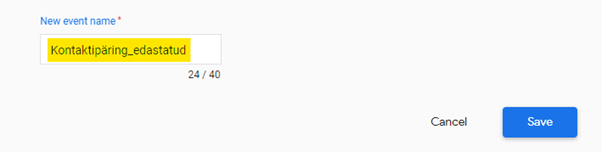
Next, add a name to your activity so you can see later if and how much of that activity was done on your website. Because we want to measure how many contact requests are forwarded on the website. We call the action “Request_sent”.
Click “Save”.
We’ve successfully seen the generated activity on the Conversions page and marked it as active, which means we’ve allowed Google Analytics to track this activity.

The generated key metric needs to be configured to include termination information in Google Analytics. To do this, we need to go back to Google Tag Manager.
We need to add a new “Tag” to Google Tag Manager. Click the “New” button.

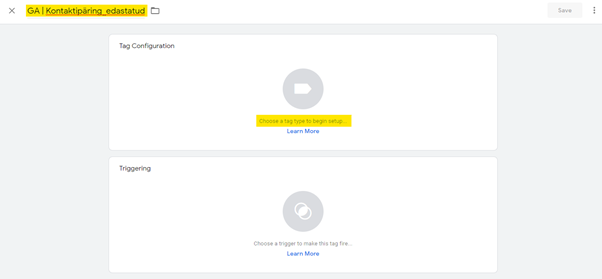
Rename your label so that you have the system to manage different labels. In this example, we’ll add GA (Google Analytics) as the first platform to understand what we’re talking about. Second, we’ll add a tag to the goal that is currently “Request_Sent”.
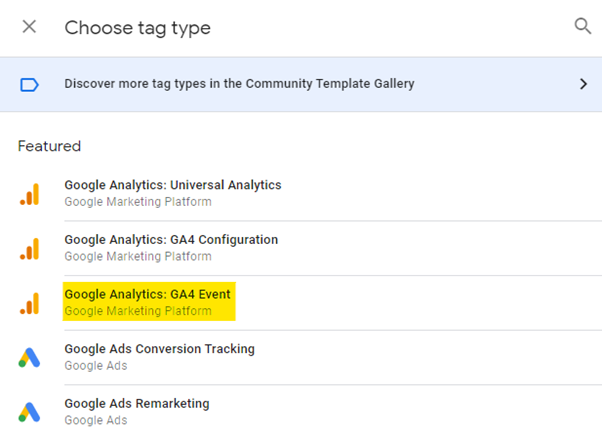
Next, click “Choose a tag type to begin setup”.
We want to indicate activities on the website, so we choose “Google Analytics: GA4 Event” as the tag type.
Select “None – Manually Set ID” under “Configuration Tag”.
In the “Measurement ID” field, add your Google Analytics code, which you can find in the “Data Streams” section of Google Analytics (see previous steps).
Set “Event name” to the same as “Conversion” or “Request_sent” in this example.
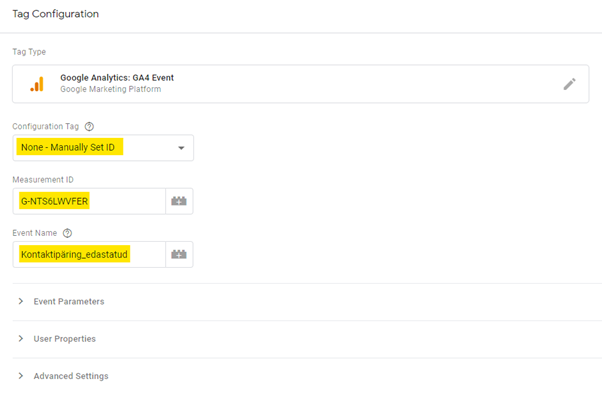
Now we have “GA | Request_submitted ”to respond when someone performs this action on the website.
In this example, we need to make the tag respond when a person reaches the “thank-you” page.
![]()
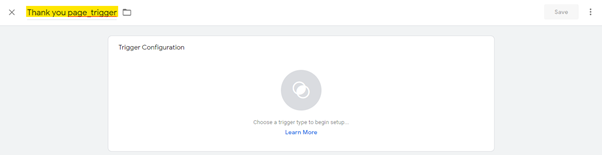
Create a new “Trigger”.

The previously created “All Pages” trigger does not work because it is initiated by each page visit. Because we need to initiate a thank-you page when we visit a specific page, we’ll create a new indicator that complies with this rule.

Rename the indicator you are creating to understand exactly what it is.
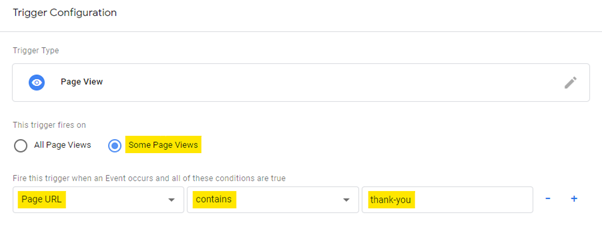
Under “Trigger Configuration”, select “Page View”.
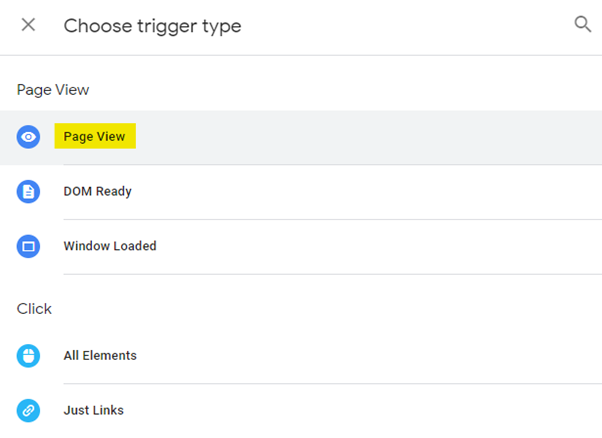
Because we want visitors to be a key performance indicator for a particular page, we select “Some Page Views” and add a web address that includes the phrase “thank-you.”
Keep in mind that adding a portion of a URL that includes other frames will result in inaccurate results in Google Analytics.
Save your actions and publish your changes to the website, as we did when adding the Google Analytics code in the previous example.
Conclusion
If you followed the guide from the beginning, you have successfully added Google Analytics to your website.
Keep in mind that Google Tag Manager allows you to configure Google Analytics to provide feedback on the various actions that people take on your website.
Our recommendation is to start with the most important settings. As your needs and demands grow, you can start tracking new activities on your website.
Be sure to test everything before publishing.
Depending on the specifics of the website or errors made in setting it up, Google Analytics may measure results twice or not work at all. This means that the statistics collected from the website will be affected.
Therefore, we recommend that you constantly test and monitor that everything is as it should be. In particular, you should review your Google Analytics settings after making changes to your website.